Tie Dye Techniques⁚ A Comprehensive Guide
This comprehensive guide explores the world of tie dye, covering everything from basic techniques to advanced patterns and safety precautions. Dive into the history and cultural significance of tie dye, learn essential supplies, and master folding techniques like spiral, crumple, accordion, and shibori. Discover dyeing methods using rubber bands, squeeze bottles, and dip dyeing, and explore advanced techniques for unique results. Find inspiration and ideas to fuel your creativity, along with safety tips and resources for further learning.
Introduction to Tie Dye
Tie dye, a vibrant and expressive art form, involves dyeing fabric with a unique technique that creates captivating patterns and colors. This captivating process utilizes a resist dyeing method, where sections of fabric are tied or bound to prevent dye from penetrating those areas. This creates a mesmerizing interplay of color and white space, resulting in a kaleidoscope of designs. Tie dye is a versatile technique that can be applied to a wide array of fabrics, from t-shirts and clothing to home decor items and accessories. The beauty of tie dye lies in its endless possibilities, allowing for boundless creativity and self-expression through a fusion of color, pattern, and texture.
History and Cultural Significance of Tie Dye
The history of tie dye is deeply intertwined with diverse cultures and traditions around the globe. In ancient India, a technique known as Bandhani, which involves tying small sections of fabric with thread, was used to create intricate patterns and designs. Similarly, in Japan, Shibori, a resist dyeing technique using various folding and binding methods, has been practiced for centuries. These traditional techniques highlight the enduring appeal and cultural significance of tie dye, showcasing its ability to transcend time and borders. The introduction of tie dye to the West in the 1960s and 1970s, particularly in the United States, transformed it into a symbol of counterculture and self-expression. The vibrant colors and bold patterns became synonymous with the hippie movement, promoting peace, love, and individuality.
Essential Supplies for Tie Dyeing
Before embarking on your tie-dye journey, gather the essential supplies to ensure a successful and enjoyable experience. A tie-dye kit typically includes everything you need, but if you prefer to assemble your own, here’s a comprehensive list⁚ Fabric⁚ Choose natural fibers like cotton or linen, which absorb dye well. Rubber bands⁚ Use a variety of sizes and types to create different tie-dye patterns. Gloves⁚ Protect your hands from the dye with disposable gloves. Dye⁚ Opt for fiber-reactive dyes for vibrant and long-lasting results. Squeeze bottles⁚ Apply dye precisely with squeeze bottles for intricate patterns. Plastic sheeting⁚ Protect your workspace from spills and stains. Plastic containers⁚ Mix your dye solutions in plastic containers for easy handling. Measuring cups and spoons⁚ Accurately measure dye and water for consistent results. Salt⁚ Add salt to your dye solution for better color penetration and vibrancy. Synthrapol or dish soap⁚ Use Synthrapol or dish soap to help set the dye and remove excess color.
Preparing Fabric for Tie Dye
Proper fabric preparation is crucial for achieving vibrant and long-lasting tie-dye results. Start by pre-washing your fabric with a mild detergent to remove any sizing or finishes that may interfere with dye absorption. Allow the fabric to dry completely before proceeding. For a more even dye distribution, soak the fabric in a solution of soda ash or washing soda for about 30 minutes. This helps to raise the pH of the fabric and make it more receptive to the dye. Rinse the fabric thoroughly with cold water after soaking. Finally, wet the fabric again before tying or folding it, as damp fabric is easier to manipulate and allows for better dye penetration.
Basic Tie Dye Techniques
Tie dye is a wonderfully versatile craft, with a range of techniques to explore. Whether you’re a beginner or an experienced crafter, mastering a few basic techniques will unlock endless creative possibilities. The most common method involves using rubber bands to create sections of fabric that resist the dye. By wrapping rubber bands tightly around the fabric, you can create distinct patterns, like spirals, stripes, or bullseyes. Another technique involves folding the fabric into various shapes, like pleats, accordion folds, or crumpling. These folds create defined areas that allow for controlled dye application, resulting in unique and intricate designs. The key is to experiment with different folding and tying techniques, exploring the unique patterns they create.
Folding Techniques
Folding techniques are the heart of tie dye, creating the intricate patterns that make this craft so captivating. Each fold results in a unique design, offering a vast spectrum of creative possibilities. The classic spiral tie dye, achieved by twisting the fabric into a tight spiral and securing it with rubber bands, creates a mesmerizing circular pattern. For a more organic and unpredictable look, the crumple tie dye technique involves randomly scrunching and folding the fabric, creating a nebulous and abstract design. The accordion fold, where the fabric is folded in a series of even pleats, results in bold, striped patterns. A more sophisticated technique, shibori tie dye, involves binding, stitching, or knotting the fabric in various ways to create intricate, resist-dye patterns. By exploring these folding techniques, you can unlock a world of creative potential, transforming plain fabric into vibrant works of art.
Spiral Tie Dye
The spiral tie dye technique is a classic and beloved method, resulting in mesmerizing, circular patterns. To create a spiral tie dye, begin by laying your damp fabric flat. Pinch the center of the fabric between your thumb and forefinger, and twist the fabric around your fingers, creating a tight spiral. Continue twisting until the entire fabric is wound into a compact ball, resembling a tightly coiled spring. Secure the spiral with rubber bands, ensuring they are evenly spaced and tight to prevent the dye from bleeding. Once the fabric is securely tied, you can begin applying dye, allowing the colors to seep into the fabric and create the iconic circular design. The spiral tie dye technique is simple to learn and incredibly versatile, allowing you to experiment with different color combinations and dye application methods to achieve unique and stunning results.
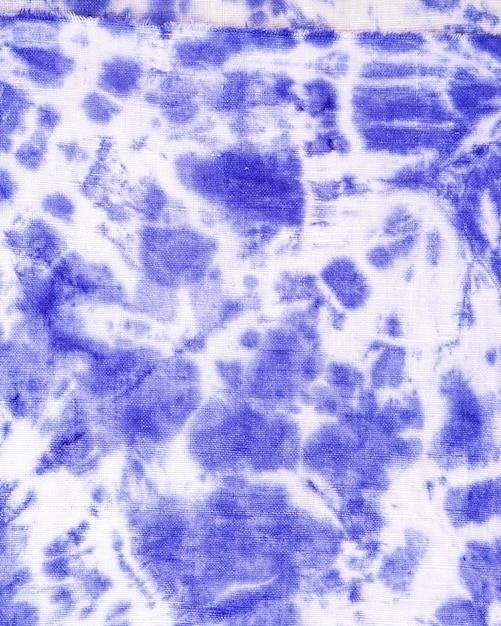
Crumple Tie Dye
The crumple tie dye technique is a wonderfully forgiving method, perfect for beginners and those looking for a more free-flowing, abstract design. Start by laying your damp fabric flat and simply scrunching it up with your hands, forming a lumpy mound. The key is to create random folds and creases, as this will determine the unique pattern of your tie dye. Once the fabric is crumpled to your liking, secure it with rubber bands, ensuring they are wrapped tightly to prevent the dye from spreading beyond the desired areas. The crumple tie dye technique is a great way to embrace spontaneity and create unique, unpredictable patterns that reflect the natural flow of the fabric. You can experiment with different levels of crumpling and the placement of rubber bands to achieve a variety of effects.
Accordion Fold Tie Dye
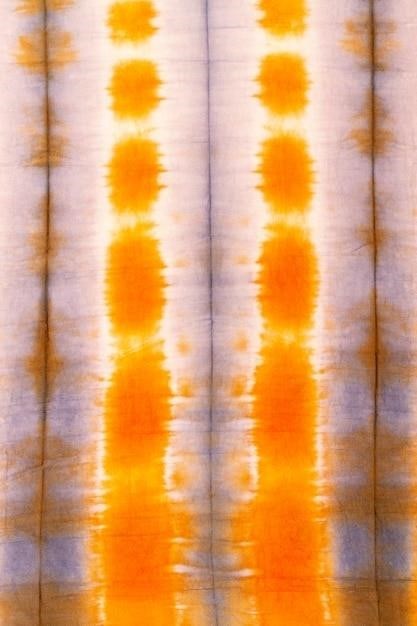
The accordion fold tie dye technique is a simple yet effective method for creating vibrant, linear patterns. It involves folding your fabric in a series of even, overlapping pleats, resembling the bellows of an accordion. Start by folding your damp fabric in half lengthwise, then in half again to create a long, skinny rectangle. Next, fold the fabric into a series of even pleats, ensuring each fold is the same width. Secure these folds with rubber bands at regular intervals. Once the fabric is tightly secured, you can apply dye to the exposed edges of the pleats. The dye will then bleed through the fabric, creating a series of bold, parallel stripes. Experiment with different dye colors and the number of folds to create unique and eye-catching accordion tie dye designs.
Shibori Tie Dye
Shibori is an ancient Japanese resist dyeing technique that involves binding, stitching, or folding fabric to create intricate patterns. This traditional art form has been practiced for centuries and produces unique, often abstract designs with a distinct charm. Shibori techniques can range from simple to complex, with variations like “kanoko” (small dots), “arashi” (storm), and “tsujigahana” (cross-hatch). To achieve shibori patterns, the fabric is carefully manipulated before dyeing. Techniques involve tightly binding the fabric with string, creating folds, or using stitching to form resist areas. After the dye has been applied, the fabric is untied or unstitched, revealing the intricate patterns created by the resist. Shibori is a truly unique and artistic approach to tie dye, offering endless possibilities for creativity and expression.
Dyeing Techniques
Once your fabric is prepared with the desired folds, ties, or stitches, it’s time to apply the dye. There are several popular techniques, each offering distinct results and levels of complexity. Applying dye with rubber bands is a classic method, where the fabric is tightly secured with rubber bands before being submerged in a dye bath or having dye applied directly to the surface. Squeeze bottles allow for greater control and precision, enabling you to create precise lines and intricate patterns. Dip dyeing involves immersing the fabric completely in a dye bath, resulting in a more evenly distributed color. Experiment with different methods to discover the techniques that best suit your artistic vision. Remember, the key is to ensure the dye fully saturates the fabric for vibrant and long-lasting results.
Applying Dye with Rubber Bands
This classic tie-dye technique offers a simple yet effective way to create vibrant patterns. Start by securing your folded or scrunched fabric with rubber bands, ensuring they are tightly wrapped to prevent dye from seeping into the areas they enclose. The number of bands and their placement will determine the design, so experiment with different arrangements to create unique patterns. Once your fabric is secured, you can either submerge it in a dye bath, allowing the dye to penetrate the fabric evenly, or apply the dye directly with a brush or sponge, carefully working the dye into the folds and crevices. The longer you allow the dye to sit, the deeper and more intense the color will become. Remember to wear gloves to protect your hands from the dye.
Using Squeeze Bottles for Dye Application
Squeeze bottles offer precise control and allow for intricate tie-dye designs. They are particularly useful for creating detailed patterns, swirls, and gradients. To use squeeze bottles, first prepare your dye by mixing it according to the manufacturer’s instructions. Then, fill your squeeze bottles with the dye, leaving some space at the top for air. Place your fabric flat on a protected surface, and carefully squeeze the dye onto the fabric, creating your desired design. Experiment with different squeezing techniques, such as squeezing in a spiral motion or creating dots and lines. Remember to wear gloves to protect your hands from the dye, and work in a well-ventilated area.
Dip Dyeing
Dip dyeing is a simple and effective tie-dye technique that involves immersing fabric in a dye bath. It’s a great way to create a subtle ombré effect or a bold, solid color. To dip dye, start by preparing your dye bath according to the manufacturer’s instructions. Then, carefully dip the fabric into the dye bath, ensuring that the desired portion of the fabric is fully submerged. For a gradual ombré effect, gradually dip the fabric deeper into the bath over time. For a solid color, fully submerge the fabric and allow it to soak for the recommended amount of time. After soaking, remove the fabric from the dye bath and rinse it thoroughly with cold water until the water runs clear. Finally, wash the fabric in a washing machine with detergent to set the dye.
Setting and Washing Tie Dye
After the dye has had time to penetrate the fabric, it’s crucial to set and wash your tie-dye project properly. This process helps to prevent the dye from fading or bleeding and ensures your vibrant colors last. Start by rinsing the fabric thoroughly with cold water until the water runs clear. This removes excess dye and helps to prevent color bleeding. Once the fabric is rinsed, wash it in a washing machine with a mild detergent. It’s best to wash the tie-dye project separately from other laundry items to avoid any dye transfer. For best results, wash in cold water and air dry the fabric. Avoid using hot water or a dryer as this can cause the dye to fade or bleed. Once the fabric is dry, you can enjoy your unique and vibrant tie-dye creation!
Advanced Tie Dye Techniques
Once you’ve mastered the basics of tie-dye, it’s time to explore more advanced techniques for truly unique and intricate designs. These techniques often involve specialized folding, binding, and dyeing methods to create complex patterns and textures. One popular technique is Shibori, a Japanese resist-dyeing method using techniques like stitching, binding, and folding to create intricate geometric patterns. For a more abstract look, consider tie-dye with bleach, creating reverse tie-dye designs that highlight the white fabric. Experiment with layering colors and incorporating different dyeing methods to create a one-of-a-kind masterpiece. Don’t be afraid to experiment and let your creativity guide you!
Tie Dye Inspiration and Ideas
The world of tie-dye is brimming with endless inspiration! From classic spirals to intricate shibori patterns, the possibilities are truly boundless. For a vibrant and playful look, try combining bright, contrasting colors like pink, orange, and yellow. For a more subtle aesthetic, opt for soft pastels or earthy tones. Consider incorporating natural elements like leaves, flowers, or even fabric scraps into your tie-dye designs for unique textures and patterns. Get inspired by nature, art, fashion, and even your own imagination to create truly one-of-a-kind tie-dye masterpieces. Remember, there are no rules in tie-dye, so embrace your creativity and let your imagination run wild!
Safety Precautions for Tie Dyeing
Tie-dyeing is a fun and creative activity, but it’s essential to prioritize safety. Always wear gloves to protect your hands from dye stains. Work in a well-ventilated area to prevent inhaling dye fumes. Cover your work surface with plastic sheeting or newspaper to prevent spills and stains. Use a dedicated set of tools for tie-dyeing to avoid contaminating other crafts. Keep dye out of reach of children and pets. Rinse your tie-dye items thoroughly after dyeing to remove any excess dye. Store dye bottles properly to prevent spills and leaks. Always follow the manufacturer’s instructions for safe handling and disposal of dye. By taking these precautions, you can enjoy a safe and enjoyable tie-dye experience.
Tie Dye Resources and Tutorials
The world of tie dye is vast and brimming with resources for aspiring artists. Explore online platforms like YouTube, Pinterest, and Instagram for a plethora of tie-dye tutorials covering diverse techniques, patterns, and color combinations. Numerous websites offer downloadable PDFs containing step-by-step instructions, folding diagrams, and color palettes to guide your tie-dye journey. Don’t hesitate to seek inspiration from seasoned tie-dye artists who share their knowledge and expertise through blogs, articles, and online communities. These resources offer valuable insights into the art of tie dyeing, empowering you to create captivating and unique designs.
Write Reviews
Leave a Comment
No Comments & Reviews